The Artec Ray is a portable and compact long-range LIDAR 3D scanner. A battery lets you scan both indoors and outdoors for up to 4 hours, making this a perfect solution for onsite 3D scanning. There are 3 ways to control the Artec Ray:
Via USB: Tethered to a Computer (Instructions)
- User controls scanner via Artec Studio software on external computer
- Scanning data is transferred to external computer via USB
- Scans are stored on the local storage of the external computer
- Power may be supplied either by battery or via power cable
Via WiFi: Artec Remote iOS or Android App (Instructions)
- User controls scanner via Artec Remote app on external device
- Scanning data is transferred to external device via Wi-Fi
- Scans are stored on the microSD card inserted in a microSD slot
- Power may be supplied either by battery or via power cable
Autonomous Mode (Instructions)
- The scanner is operated by using the start/stop button on its body without connecting to external devices
- Default settings are stored on internal embedded storage
- Scans are stored on the microSD card inserted in the microSD slot
- Obtained scans should be processed on a computer
- Power may be supplied either by battery or via power cable
The Artec Ray has the following scan modes:
- Full scan – if you need to scan the whole area without preview
- Particular scan – if you have marked the selected regions in a preview image (not possible in Autonomous mode)
Tips for setting up the Artec Ray on location
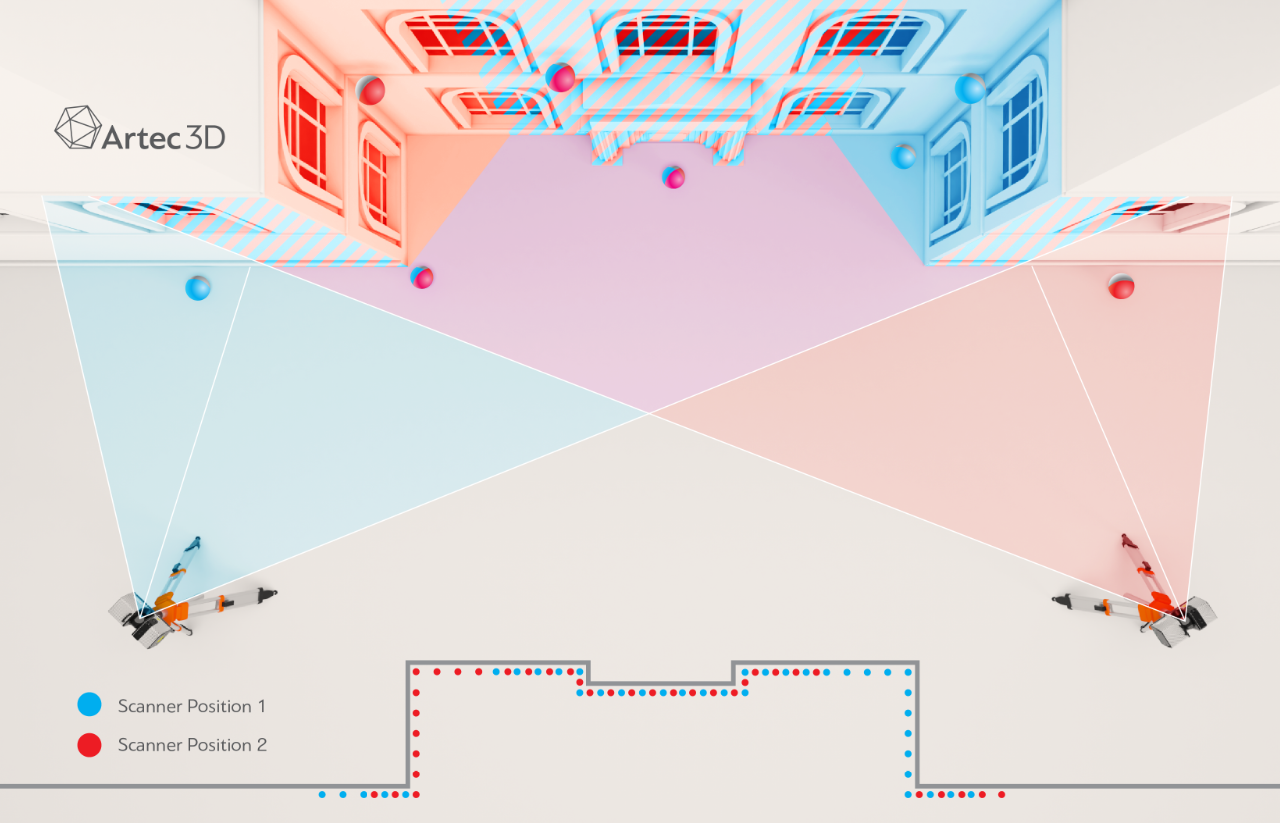
In some cases, you may have to scan an object from more than one location. Take the time to decide how many viewpoints you’ll need to scan the entire object/area. Once you have defined the required positions, follow these steps:
- Ensure that the viewpoints together cover the entire object and that each one covers as much of the object as possible.
- Ensure the scanner rests firmly on the floor.
- Capture a preview and configure the settings.
- Scan the area or object.
- Repeat the steps above for the remaining viewpoints.